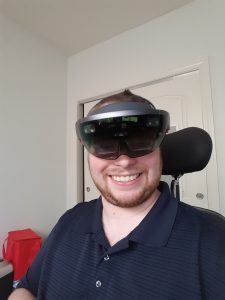
I’ve started my adventure of learning how to program for the Microsoft HoloLens. If you haven’t heard about this new adventure please check out my blog post My Microsoft HoloLens Adventure – Introduction. On that blog post I have a video introducing myself, and my intentions. In addition I’ve included a video of the unboxing of the Microsoft HoloLens. Throughout this blog post I will highlight the steps required to get your PC setup to program the HoloLens.
System Requirements:
- Windows 7 SP 1 or greater (Windows 10 recommended) – Must be Professional, Enterprise or Education edition
- Hyper-V enabled on the system
- 64-bit CPU with at least 4 cores
- 8 GB of RAM
- BIOS that supports:
- Hardware-assisted virtualization
- Second Level Address Translation (SLAT)
- Hardware-based Data Execution Prevention (DEP)
- GPU that supports:
- DirectX 11.0 or later
- WDDM 1.2 driver or later
Enable Hyper-V:
- Open Control Panel
- Click Programs
- Click Turn Windows features on or off
- Check Hyper-V
- Click OK
- Restart computer when install finishes
Installing Visual Studio 2015:
To write applications for the HoloLens you must use Visual Studio 2015 with Update 2 installed to write the Universal Windows App. Luckily you can use the Visual Studio 2015 Community edition at no cost! The community edition will provide enough features for you to get started, however if you are an experienced developer and want to dig into more depth you may want to evaluate the Professional or Enterprise editions. To compare what each edition has check out the Compare Visual Studio 2015 Offerings page.
Procedure:
- Download Visual Studio Community Edition
- Run the Installer
- Choose custom install
- Select Tools and Windows 10 SDK
- Click Install
HoloLens Emulator:
To develop for the HoloLens doesn’t require that you have a HoloLens – although it does make it more entertaining! If you do not own one do not fear – you can download and install the HoloLens Emulator.
Procedure:
- Download the HoloLens Emulator
- Run the Installer
- Click Next
- Click Next
- Read and review the License Agreement
- Click Accept
- Click Install
Unity HoloLens Technical Preview Beta:
To build holographic applications you need to use the Unity HoloLens Technical Preview – this gives you the ability to place 3D Models into your applications to be treated as Holograms.
Procedure:
- Download the 32-bit or 64-Bit client based on your needs.
- Run the Installer
- Click Next >
- Read and review the License Agreement
- Click I Agree
- Click Next >
- Click Install
- Click Finish
- Download the UWP Runtime
- Run the Installer
- Click Next >
- Read and review the License Agreement
- Click I Agree
- Click Install
- (Optional) Download the offline documentation
- Run the Installer
- Click Next >
- Read and review the License Agreement
- Click I Agree
- Click Install
- Click Finish

Hi Matt,
I’m getting following error when trying to install emulator on windows 7.
[We can’t detect whether your PC supports hardware virtualization. You may need to enable it. For more information, see MSDN article at “http://go.microsoft.com/fwlink/?LinkId=247585”]
I opened a bug report on connect.microsoft, they’re also saying Windows 10 is required.
Can you please confirm that you were able to install emulator on Windows 7 ?