Microsoft

My Microsoft HoloLens Adventure – Preparing Study Resources

As I continue my adventure of learning how to program for the HoloLens, the first step is actually learning how to program! I am lucky enough that I took some programming classes while in College and I’ve done a lot of Scripting in Windows PowerShell – this helps me understand programming constructs. I just need to become more well-practices in the area of Object Oriented Programming and understanding the C# Syntax.

visual-studio-2013-logo

Basics:

To do this I actually started digging in a bit back in March covering some of the basics to refresh my memory. One of my favorite resources is the Microsoft Virtual Academy. I haven’t watched much but the first video I started watching was Bob Tabor’s C# Fundamentals for Absolute Beginners. As the subject says this is for absolute beginners so I’ve done a bit of skimming on a lot of the videos, but it gives a good introduction if you haven’t programmed before. I most likely will continue to skim these videos occasionally just to keep my mind fresh since I haven’t written a full blow application before.

Universal Apps:

The next video series I intend to watch is the Developing Universal Windows Apps with C# and XAML. The reason I am wanting to check with video out is my applications I want to have work across all Windows Platforms – this is something I’ve never done so it’ll be a challenge to pick it up. The nice thing about using this as a stepping stone is Universal Apps will not only work on HoloLens but also Windows 8+ Windows PC’s and Windows Phones.

HoloLens Apps:

When developing for the HoloLens there are two different types of app models, let’s explore each one.

2D Apps:

2D HoloLens apps will be the easiest ones to build – at least I think it will be for me. These apps are just like any other Windows Universal App, except the HoloLens will project the 2D App on a wall, or in front of you while using the HoloLens.

To make 2D Apps on the HoloLens I am intending to heavily rely on the Developing Uniersal Windows Apps with C# and XAML that is referenced under Universal Apps section.

In addition to the video the Microsoft Dev Center also has a couple of pages on building 2D Apps.

Building 2D apps
Current limitations for apps using APIs from the shell

Holographic Apps:

Holographic Apps are a very new concept – this is what makes the HoloLens a truly magical experience. You will see 3D renderings throughout your house, office, or where ever you are using the HoloLens at.

To start developing for HoloLens you must understand the different ways to interact with the HoloLens. This includes

World coordinates
Gaze input
Gesture input
Voice input
Spatial sound
Spatial mapping

To get a better understanding of the ways you interact with the HoloLens I suggest taking a look at the Development Overview video from Microsoft.

As I continue my adventure with learning how to develop for HoloLens I’ll make sure I share more information as I find it.
My Microsoft HoloLens Adventure – Setting up the Development Tools

I’ve started my adventure of learning how to program for the Microsoft HoloLens. If you haven’t heard about this new adventure please check out my blog post My Microsoft HoloLens Adventure – Introduction. On that blog post I have a video introducing myself, and my intentions. In addition I’ve included a video of the unboxing of the Microsoft HoloLens. Throughout this blog post I will highlight the steps required to get your PC setup to program the HoloLens.

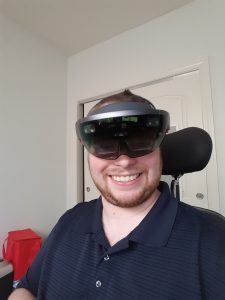
Matt wearing the Hololens

System Requirements:

  • Windows 7 SP 1 or greater (Windows 10 recommended) – Must be Professional, Enterprise or Education edition
  • Hyper-V enabled on the system
  • 64-bit CPU with at least 4 cores
  • 8 GB of RAM
  • BIOS that supports:
    • Hardware-assisted virtualization
    • Second Level Address Translation (SLAT)
    • Hardware-based Data Execution Prevention (DEP)
  • GPU that supports:
    • DirectX 11.0 or later
    • WDDM 1.2 driver or later

Enable Hyper-V:

  1. Open Control Panel
  2. Click Programs
  3. Click Turn Windows features on or off
  4. Check Hyper-V
  5. Click OK
  6. Restart computer when install finishes

Installing Visual Studio 2015:

To write applications for the HoloLens you must use Visual Studio 2015 with Update 2 installed to write the Universal Windows App. Luckily you can use the Visual Studio 2015 Community edition at no cost! The community edition will provide enough features for you to get started, however if you are an experienced developer and want to dig into more depth you may want to evaluate the Professional or Enterprise editions. To compare what each edition has check out the Compare Visual Studio 2015 Offerings page.

Procedure:

  1. Download Visual Studio Community Edition
  2. Run the Installer
  3. Choose custom install
  4. Select Tools and Windows 10 SDK
  5. Click Install

HoloLens Emulator:

To develop for the HoloLens doesn’t require that you have a HoloLens – although it does make it more entertaining! If you do not own one do not fear – you can download and install the HoloLens Emulator.

Procedure:

  1. Download the HoloLens Emulator
  2. Run the Installer
  3. Click Next
  4. Click Next
  5. Read and review the License Agreement
  6. Click Accept
  7. Click Install

Unity HoloLens Technical Preview Beta:

To build holographic applications you need to use the Unity HoloLens Technical Preview – this gives you the ability to place 3D Models into your applications to be treated as Holograms.

Procedure:

  1. Download the 32-bit or 64-Bit client based on your needs.
  2. Run the Installer
  3. Click Next >
  4. Read and review the License Agreement
  5. Click I Agree
  6. Click Next >
  7. Click Install
  8. Click Finish
  9. Download the UWP Runtime
  10. Run the Installer
  11. Click Next >
  12. Read and review the License Agreement
  13. Click I Agree
  14. Click Install
  15. (Optional) Download the offline documentation
  16. Run the Installer
  17. Click Next >
  18. Read and review the License Agreement
  19. Click I Agree
  20. Click Install
  21. Click Finish

My Microsoft HoloLens Adventure – Introduction

I’m back!!! It’s been almost a year to the day! I previously had claimed I was going to become much more active in my blogging and that turned out to be a lie. I had just started a new job and was expecting to have more ‘free’ time – that was laughable in retrospect. It’s been one of the busiest years in my life, and not really looking like it’ll slow down at all.

However I am pushing myself to do more! When the HoloLens developer application opened sometime back in 2015 – my gut wants to say early 2015 but I can’t say for certain I applied to be a developer, I thought for kicks it might be fun. I filled out the application 100% honestly and figured I’d never be accepted.

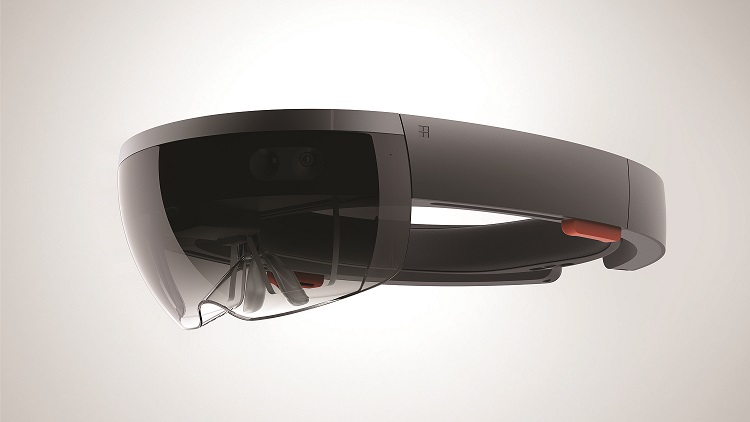
MSHoloLens_Image_1_CMYK

On February 29th of 2016 I received an email that I was accepted into wave 1 – I was shocked, thrilled and thought there is no way I can justify the cost. I spent weeks contemplating if I would drop the money and if I did what would I even program on it?

After about 1-2 weeks of pondering a couple of ideas for applications I decided I could justify the expense, then weeks – heck months passed before I actually got the purchase link from Microsoft. I spent a few more hours considering it and decided to take the plunge. I received the purchase link email from Microsoft on Monday May 9th at 9:33 AM – I read it around 6:00 PM. I made my purchase at 7:32 PM. I received an email that the HoloLens shipped from Shanghai China Tuesday at 11:17 PM. From looking at the tracking history the HoloLens went from Shanghai to my door step within 26 hours.

I still had a full work day to knock out so I didn’t get to actually open the HoloLens for another ~9 hours. While doing the opening I made an unboxing video which can be seen below. I do apologize for the echo but I didn’t have a good quality mic available.

Reflecting on Ignite 2015 – The Good, The Bad and The Ugly

I know I am late to the game, Ignite ended over a week ago! I would just like to share my perspective on how the week went, as it was quite different than I am used to. This year I went to Ignite as Staff, I’ve never worked a conference, let alone one the size of Ignite.

Note: I thought it would be a good idea to shave - not doing this again for a long time!
Note: I thought it would be a good idea to shave – not doing this again for a long time!

My week of Ignite actually started quite early, I arrived Friday May 1st in the evening to Chicago. My first thought it holy cow I’m going to hate Chicago, they had the NFL Draft going, and traffic was crazy. I’ve been to Chicago before but did not remember how much traffic there was! After missing a turn and adding an additional 20 minutes to my 2 1/2 hour drive from Indianapolis I was ready to unwind in the hotel. Check-in was fairly easy, aside from the long wait to check in.

Building a Desired State Configuration (DSC) Lab

Recently I presenting at the Indianapolis PowerShell User Group and talked about Desired State Configuration. The presentation was 100% demonstrations, and I decided it would be a good idea to provide all of the PowerShell commands/instructions I used to build my lab environment for the presentation.

Note: Please note that these instructions were written using multiple Experimental DSC Resources, Microsoft and I myself provide no guarantee that these will work in a production environment. I strongly encourage that you use test environments that do not matter until you feel comfortable with DSC.

Pre-requisites

  • Licensed/Trial Media for Windows Server 2012 R2
  • An installed/updated Sys prepped VM Parent Disk
    • Stored at D:\Templates\Server2012R2.vhdx
  • a Virtual Switch within Hyper-V Configured as a Private, named “Private Network”
  • At least 7GB of free memory
    • You can adjust this all the way down to just 4GB
  • Downloaded copy of the latest DSC Resource Kit – Download Here

Now before we dive into the scripting component of this blog post I want you to know that this is not 100% automated. You will have some manual steps here and there, it is possible to 100% automate – but that will require significantly more effort. Please continue reading for instructions on this demonstration.